How to Grow Magic Mushrooms Indoors?

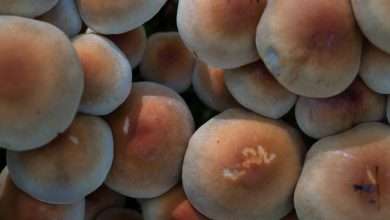
Magic mushrooms have been around for thousands of years. Having been used by the peoples such as the ancient Aztecs, magic mushrooms have managed to withstand the test of time and are still relevant today. While its uses have expanded over time, the way that people still get their magic mushrooms hasn’t changed much. To this day, many people still forage for their shrooms.
However, foraging isn’t the only way that you can get magic mushrooms nowadays. Thanks to the ingenuity of those dedicated to magic mushrooms, there are several ways to grow your own magic mushrooms. What’s more, you can even grow your shrooms from the comfort of your home!
While foraging for magic mushrooms can be fun and rewarding, so is growing your own batch! Much like gardening or even tending to that one potted plant you have, being able to grow your shrooms can be just as rewarding too! The only difference is that you’ve grown your own psychedelics.
As with growing anything else, growing magic mushrooms isn’t that easy. While the process is relatively straightforward, there are many things you’ll need to do to ensure that you get it right. For example, you’ll need to take note of things such as sterilization, heat, humidity, and moisture. If you’re not careful, you could end up ruining your batch of shrooms.
Despite all that, it’s still enjoyable to grow magic mushrooms indoors. You can learn a lot about how they grow and how to get your technique perfect. But, most importantly, you get to grow your tiny psychedelic fungi at home!
With that in mind, how do you get started?
Where Do Magic Mushrooms Grow?

Before getting to the nitty-gritty of how to grow psychedelic mushrooms at home, it’s good first to know a little more about where they usually grow.
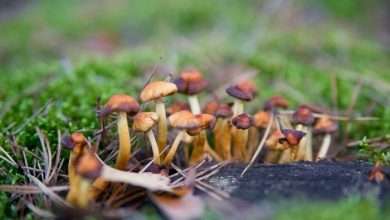
Believe it or not, magic mushrooms grow in several places. Some of these places might even be close to you, and you just might not be aware of it!
Psilocybe mushrooms are one of the most widespread psychedelic mushrooms, with species growing in different parts of the world. For example, the Psilocybe semilanceata is a shroom that you can find all over Europe and North America, among several other places.
Then, there’s the Psilocybe cubensis. This shroom thrives in tropical climates, growing in places like the United States, Central America, and Southeast Asia. This mushroom is also one of the easiest to grow indoors.
If you decide to go foraging for mushrooms to see for yourself, there’s something that you’ll need to keep in mind. While magic mushrooms can be relatively easy to find outdoors, so are poisonous mushrooms. Unfortunately, a lot of poisonous mushrooms and magic mushrooms look alike.
With that in mind, it’s advisable that you first identify the mushroom you’ve found out in the wild. By doing so, you’re doing your part to ensure that you don’t endanger yourself by poisoning or, worse, causing your own death. When in doubt, just don’t.
Magic Mushroom Grow Kits
One of the easiest ways to grow shrooms indoors is to use grow kits. There are two ways that you can go about acquiring grow kits. The first option is you can buy one from a specialty mushroom shop. However, there are some drawbacks to this. If you aren’t sure about who you’re buying from, you could get a kit that might not be as good as you expected.
As an alternative, you could also make your own grow kit. You’re at least aware of its quality by making your own grow kit. You know what went into the kit and what to expect from each component. Plus, the quality is also entirely up to you.
The following guide will focus mainly on growing your mushrooms with your own grow kit.
What You Need
If you decide to make your own grow kit, here are the materials that you’ll need:
- 12cc’s worth of a spore syringe
- One dozen wide-mouthed glass jars (one-half pint)
- Hammer and small nail
- Mixing bowl
- Strainer
- Aluminum foil
- Large pot with a lid
- Hand towel
- Micropore tape
- Clear plastic storage box (50 to 115 liters in capacity)
- Drill with a quarter-inch bit
- Perlite
- Spray bottle
- Vermiculite (two-thirds a cup per jar)
- Drinking water (a quarter cup per jar)
- Organic brown rice flour (a quarter cup per jar)
- Rubbing alcohol
- Torch lighter
- Disinfectant
- Sanitizing spray
The Process

Jar Preparation
First, you have to disinfect the hammer and nail you’ll be using. After disinfecting, use the nail to punch four holes around the perimeter of the jar’s lid. Make the holes as evenly spaced as possible.
Substrate Preparation
Now, prepare the substrate for the kit. To do this, mix two-thirds of a cup of vermiculite with a quarter cup of water in a mixing bowl. This mixture is good for one jar. Repeat as necessary.
Next, disinfect your strainer. Then, use the strainer to remove any excess water from the water-vermiculite mixture. After straining, add a quarter cup of the brown rice flour to each jar portion of your vermiculite mixture.
Placing the Substrate
After preparing your substrate, you can add them to your jars. First, put one jar portion of the substrate in your jar. Leave a half-inch space below the jar’s rim. Then, sterilize the exposed parts of the glass with your rubbing alcohol. Afterwards, fill the rest up with some dry vermiculite.
Sterilization
After filling up the jars, tightly place the lids on and cover them with some foil. It’s essential that you ensure that water and condensation do not enter through the jar’s holes. So, secure that foil properly.
In the base of your pot, place a towel. Then place your jars on that towel. Next, fill the pot up until half of the jars. Now, bring the water to a boil.
You should steam your jars for about 75 to 90 minutes. Be sure to occasionally add water, especially if the pot seems to be boiling dry. Also, ensure that the jars stay upright and untouched during the sterilization process.
After you’ve steamed them, let them cool overnight or until they’ve reached room temperature.
Syringe Preparation

Once your substrate is ready and you’ve sterilized your jars, it’s time to prepare your syringe for spore inoculation.
First, you’ll need to sterilize your syringe. You can do that by using a lighter to heat the needle. Heat it until the needle glows red. Then, take it off the fire and let it cool down. Once it cools down, wipe the needle down with alcohol. Be sure to avoid touching the needle. If you want to take an extra step, you can do all that while using sterile latex gloves.
After the sterilization process, pull the plunger back slightly and then thoroughly shake the syringe.
Spore Inoculation
Now the time has come to inoculate your spores!
First, remove the foil from the jar of your choice. Then, angling it towards the side of the jar, insert the syringe needle through the holes as far as you can put it. Proceed to inject a quarter of a CC of the spores. After inoculating, remove the syringe and wipe it down with alcohol. Then, repeat this step for the remaining holes.
After you’ve inoculated through all the holes, cover the holes with micropore tape.
Then, repeat this entire step for the rest of your jars.
Waiting Stage
Now for the challenging part: the wait.
After you’ve inoculated all your jars, put them in a clean place. Make sure that you put them somewhere where the jars will not be disturbed. Also, ensure the area is kept at room temperature and that the jars are kept away from direct sunlight.
In about a week or two, you’ll already get to appreciate the appearance of white mycelium. In three to four weeks, you’ll start to notice that half of your jars will have mycelium colonies (a.k.a. cakes). Once you’ve reached this point, give your colonies another week to help the mycelium strengthen.
Should your jars have any form of contamination, it’s advisable to dispose of them. Carefully do this outdoors with a secure bag, not removing the jar’s lid.

Fruiting Chamber Preparation
Now comes the fruiting chamber preparation!
Using your drill with the quarter-inch bit, drill holes all over your plastic container, including the lid and the base. Make sure that the holes have about two inches of space between them.
Then, find a stable platform to place your box. Make sure that the platform can still allow for airflow under the box. A dryer rack would be a perfect example!
Afterwards, cover your box to allow for moisture retention.
Adding Perlite
Next, it’s time to prepare your perlite. First, place it on a strainer. Then, allow it to soak with water by running some water over the strainer.
After you’ve given the perlite a proper soak, drain it and then spread it over your container’s base.
Repeat the soak-strain-place steps until you have a perlite base layer of 4 to 5 inches.
Cake Rehydration
Once you’ve set up your fruiting chamber, it’s time to rehydrate your substrate cakes.
First, carefully remove them from their respective jars. Then, still handling them with care, rinse them with cold water. This is to remove any loose vermiculite.
Afterwards, fill your pot with room temperature water. Place the substrate cakes in the pot, submerging them with something like a plate.
Keeping everything at room temperature, leave your cakes to soak and rehydrate for 24 hours.
The Cake Roll

Once your cakes have been rehydrated, remove them from the pot and place them on a sanitized surface. Then, roll your substrate cakes and coat them with a bowl full of dry vermiculite.
Cake Transfer
You’re almost there! Now you just need to transfer your cakes to your fruiting chamber. But, before you move your cakes, you need to set some aluminum foil squares. This is to ensure your cakes do not touch the perlite. So, make sure your squares are big enough for your cakes.
Once they’re set, you can then place your substrate cakes on the aluminum squares in your fruiting chamber. Again, make sure they’re evenly spaced.
After you’ve put all of your cakes in the chamber, mist your chamber with your spray bottle. Then, fan your chamber a bit with the lid. Now, close off the chamber.
Now You Wait
You’ve done it! You’ve set up your grow kit! Now all you have to do is wait!
While you wait for your shrooms to pop up, make sure you mist your fruiting chamber four times daily. Remember, you’re misting them. So, don’t soak them in water.
Aside from misting, make sure to fan the chamber using the lid. Do this six times daily to help with optimal airflow.
As for lighting, the ambient light you have at home is enough.
Rinse and repeat these steps, and you’ll have your mushrooms in one to two months!
Is It Legal to Grow Psilocybin Mushrooms?
Now that you know how to grow magic mushrooms, you might feel the need to get started right away. But, before you do, a word of caution. As magic mushrooms, in general, are considered illegal, foraging and cultivating them are consequently unlawful as well.
So, before you decide to start your magic mushroom cultivation, make sure to do your research first to see if it’s illegal. While it may be a fun activity to engage in, it’s still better to make sure you don’t land yourself in any trouble.
Conclusion
Due to the ability of magic mushrooms to grow in several different environments, growing them from home has become an excellent alternative to foraging! What’s more, it’s just as fun as foraging for shrooms!
While the method is relatively straightforward, growing shrooms from home can still be challenging. However, if you’re someone with a green thumb or an interest in growing things, this might be the shroom-related activity for you! While it might take some time, it’ll definitely be worth it. You can even say that it’s worth the trip!